As a mobile agency, we need to make sure our clients receive an app that works consistently across many devices from different manufacturers. We always test our apps against the latest versions of the OS, as well as any prerelease versions we can get our hands-on. Testing on emulators and simulators is good as a first step in the testing process, but does not include any changes and features that manufacturers add to the OS. That is why we also test on real devices.
We currently have a collection of around 70 devices and counting. Keeping track of those devices and who has which device in use, turned out to be a bigger challenge than expected.
What we had
In the beginning, we used to have a Confluence page with a list of numbered test devices. Everyone could edit this page, to indicate that they had borrowed a device. But somehow this went wrong quickly. We regularly saw messages like this on our company Slack:
@channel who has device X. I really need it right now.
Clearly, the system wasn’t working.
We introduced a system with paper name tags and a cupboard with a dedicated (numbered) spot for each device. Every time someone borrowed a device, he/she was supposed to replace the device with their name tag. It worked most of the time. But this got out of hand quickly too. People were too lazy to write their name on a card, or things became a mess when someone needed more than one device at the same time. There was also no traceability in case a device went missing or was damaged.
What we wanted
We wanted a solution that would track the devices, as well as gather some basic analytics. If a device is barely used, we can look into the reason why and maybe replace it with a device that matches our test cases better.
By looking at the analytics data we can easily analyze the supply and demand. It also allows us to monitor when people borrow devices for a long period of time, and decide to either send them a reminder or to buy additional devices for that specific team.
Ideally, this system would be completely painless (would I dare to say fun?) to use, so people don’t forget to use it. Because if people don’t even bother, the traceability and analytics won’t matter.
Device Closet app (Android Things)
It was obvious that we needed a more modern approach to the problem. If we look at the requirements, the list is short:
A user needs to be able to borrow one or more devices
A user needs to be able to return one or more devices
An admin needs to see a log of who borrowed what and when
The system needs to be fun to use! Meaning:
We need a pretty UI (we make pretty apps, after all)
It needs to work fast without any delays
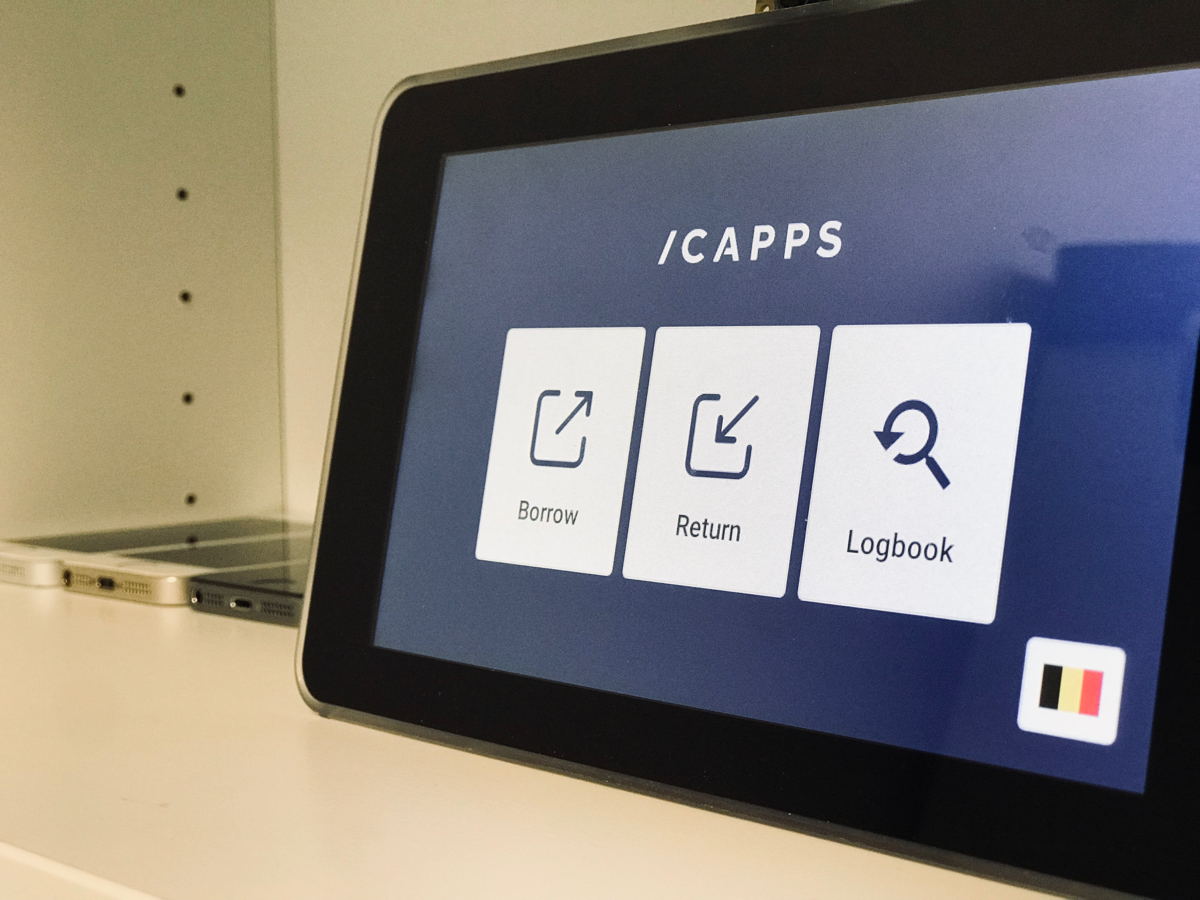
Our eye quickly landed on the Raspberry Pi with touchscreen we had lying around. We had experimented with Android Things before, and we knew from experience that this use case would be a perfect fit!
To not overcomplicate things (and perhaps to not bother our fellow backend developers) we decided to use Firebase for storing our device collection. This made the development fast and easy with barely any load times and a good user experience as a result.
One week of development later, we ended up with the following:

The app is simple. You first choose which devices you want, in a large scrolling list. The devices can be filtered by type (phone/tablet/other), OS (Android/iOS) and can be sorted by name or by label. Tapping a device adds it to your “basket”.

After confirming the chosen devices you need to confirm your identity. In the future we plan to add a badge reader to speed up this step (unfortunately our AliExpress RC522 module did not work). Right now this is just a simple list of colleagues, where you can search for your name. The list is sorted by most-recently-used so if you’ve recently borrowed a device your name will appear on top. Convenient!
If you tap your name, the borrowed or returned items will be registered and you’ll be greeted with confetti and a short overview of what you’ve borrowed.
Device Closet app (Flutter Desktop)
To manage all of the content visible on the Raspberry Pi we needed a separate application that could add, edit, remove devices and colleagues. Because we were still experimenting with Flutter we thought it would be a good idea to use Flutter to build a Desktop application.
(Koen Van Looveren) had tested the desktop capabilities for Flutter before but most of these tests were simple ‘hello world apps’. I started building this right after Google I/O where Google announced they merged the desktop library into the core library. That does not mean it is ready for production, but definitely worth doing some extra performance tests. If you want to use desktop you have to switch to the master branch in order to use the desktop environment.
How to enable desktop development
You can run flutter config to check whether you have enabled desktop op not.
flutter config --enable-linux-desktop
flutter config --enable-macos-desktop
flutter config --enable-windows-desktop
Because the desktop platform is still in beta, the Flutter team can still change the folder structure anytime. It is best to use the Flutter Desktop sample as your starting point.
Why stop there?
After I finished the desktop app. I thought it would be nice to have a tablet/iPad application as well. So I built both with a native look and feel. But why stop there? I also created a mobile version of the app with an Android and iOS-specific design. (Cupertino and Material).
What did we learn?
I found that performance for the Flutter macOS app was very good. But we did have some issues with visual glitches.
https://github.com/google/flutter-desktop-embedding/issues/400
Another problem we had was during development. For normal Android development, we use tabs on our keyboard to go to the next input field in a form. This did not work and would cause some extra visual glitches.
https://github.com/flutter/flutter/issues/30173
Because we are using a master-detail we had to figure out how we could open a new screen in the detail section when a list item was selected. We found that the best way to do this was by using multiple Navigators. A Navigator is used for displaying a new screen. This can be done with or without animation. For desktop, we do not need animations so we disabled them here.
Because the app contained 5 different platforms it was important to separate all the business logic. We found a way to share some of our code but also keep platform-specific classes so it is easy to maintain.
Analytics
Because we were using Firebase Cloud Firestore we could also use the Firebase Cloud Functions to trigger actions when a field in our database changes. This is how we generated the analytics for each colleague and device.
Conclusion
Does our new system work? Hell yes! Aside from looking pretty badass, we’ve heard many positive comments from our fellow colleagues. The system works reliably (thanks to Android Things being really simple to develop for) and unless the WiFi is spotty, everything works as expected without exceptions.

